Have you ever entered a long string of text into a cell in Excel, only to find that it disappears off the edge of the cell and you can’t read it all? If so, you’ll be pleased to know that there’s an easy solution to this problem text wrapping. Text wrapping allows you to display all the text in a cell, even if it’s a long string, by wrapping it to fit within the cell’s width. In this post, we’ll show you how to wrap text in Excel.
How to Wrap Text in Excel Video
Step-by-Step Guide: How to Wrap Text in Excel
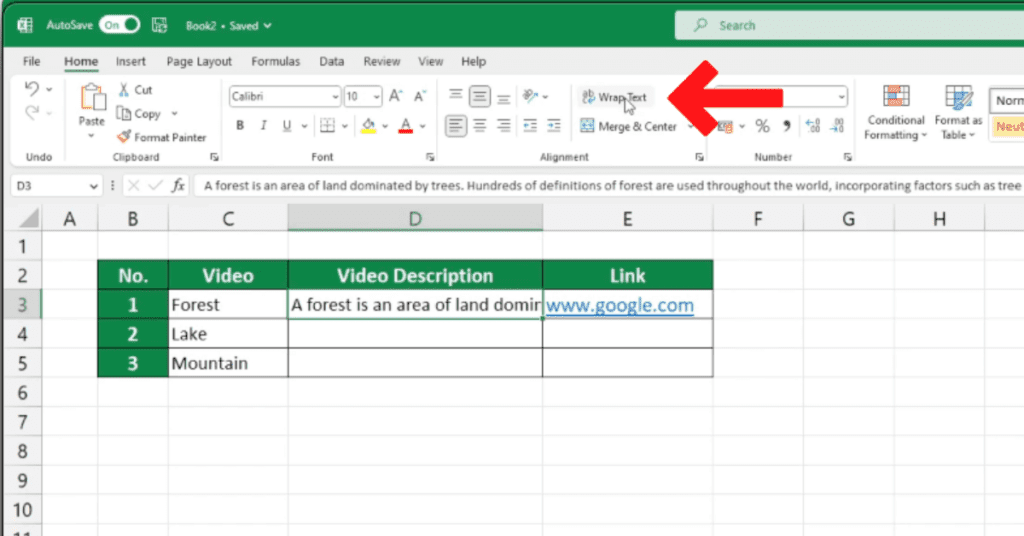
Step 1. Select the cell or range of cells that you want to wrap the text in.
Step 2. Go to the Home tab in the Excel ribbon.
Step 3. Look for the Alignment group on the Home tab.
Step 4. Click on the ‘Wrap Text’ button.

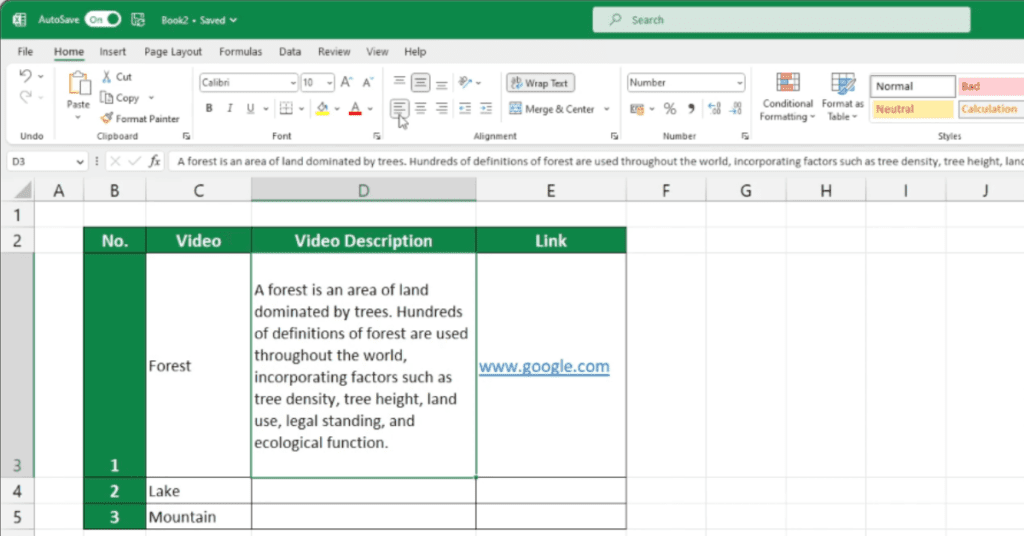
Step 5. This will wrap the text within the selected cells.
In some instance you may need to manual adjust the row and column width.

That’s it! You’ve successfully wrapped text in Excel.
Things to Keep in Mind:
- Wrapping text will only work if the cell is wide enough to fit the text. If the cell is too narrow, the text will still be cut off.
- Text wrapping can also affect the height of the cell. If the wrapped text is longer than the cell’s height, the cell will automatically adjust to fit the text.
- You can use the ‘Merge & Center’ button in the Alignment group to merge cells and center the text across multiple cells.
- Remember that wrapped text can make it harder to read, so use it sparingly and only when necessary.
With these simple steps, you can now wrap text in Excel and make your spreadsheets more readable and organized.
Learn more Excel Tips from us on our website and take your skills to the next level.
