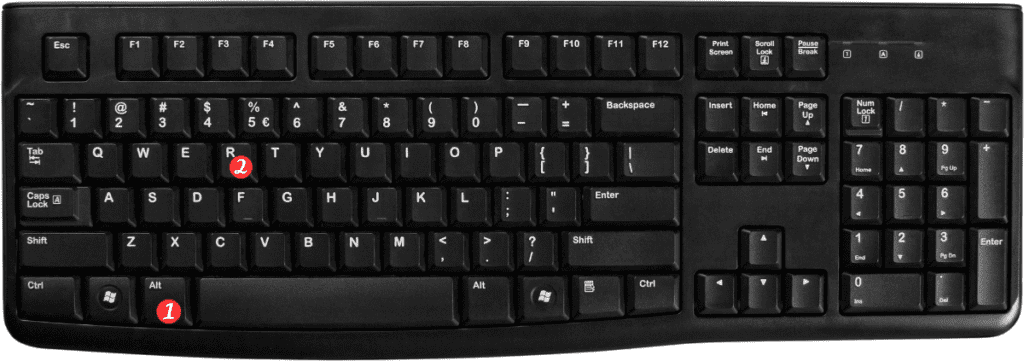
Excel is a powerful tool that allows users to manage and analyze data efficiently. One of the most common tasks when working with spreadsheets is to add or remove borders to enhance the appearance and readability of the data. In this blog post, we will focus on the Keyboard Shortcut to Add or Remove Border Right In Excel.
Why are Keyboard Shortcuts Helpful?
Keyboard shortcuts in Excel allow users to work more efficiently by performing tasks quickly without the need for a mouse. By using keyboard shortcuts, users can save time and increase productivity. Learning and using keyboard shortcuts also improves user’s accuracy and reduces the risk of errors.
Keyboard Shortcut to Add or Remove Border Right In Excel
To add or remove a border right in Excel, follow these simple steps:
Select the cell(s) to which you want to add or remove a border right.
To add a border right, use the following keyboard shortcuts:
- For Windows: Press Alt + R
- For Mac: Press ⌘ + ⌥ + →

To remove a border right, use the same keyboard shortcuts again.
Points to Remember:
You can use this shortcut to add or remove borders for multiple cells at once.
This shortcut only adds or removes a border right.
To add or remove borders for other sides of the cell(s), use the following keyboard shortcuts:
- Add or remove border top: Alt + T for Windows, ⌘ + ⌥ + ↑ for Mac
- Add or remove border bottom: Alt + B for Windows, ⌘ + ⌥ + ↓ for Mac
- Add or remove border left: Alt + L for Windows, ⌘ + ⌥ + ← for Mac
To add or remove all borders for a cell(s), use the following keyboard shortcuts:
- Add or remove all borders: Ctrl+Shift+7 for Windows, ⌘+⇧+7 for Mac
