Excel provides the flexibility to change the direction of text to enhance the appearance of a worksheet. In this tutorial, you will learn how to change text direction in Excel using the Alignment tab.
How to Change Text Direction in Excel Video
How to Change Text Direction in Excel
Step 1. Open a new or existing Excel worksheet
Step 2. Select the cell or range of cells that you want to change the text direction for
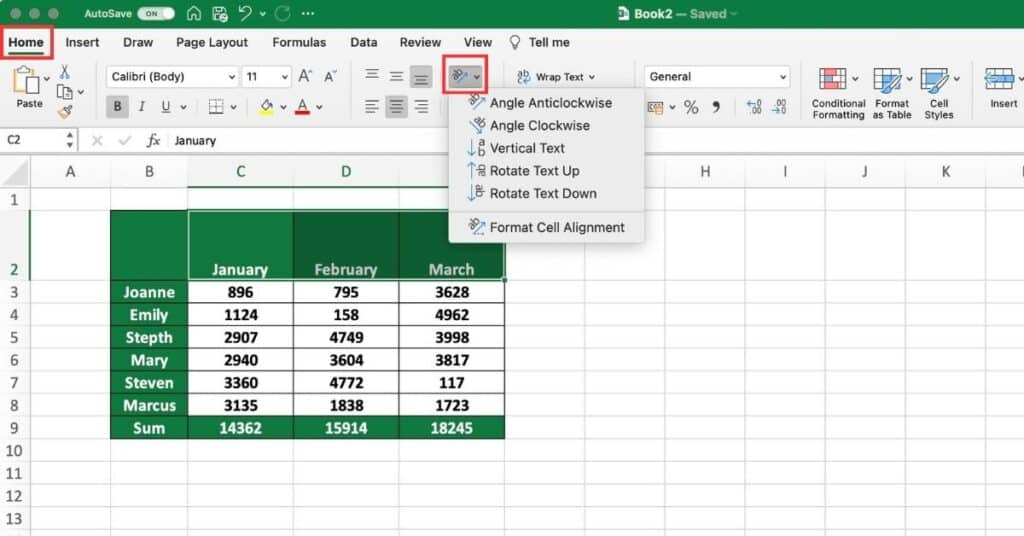
Step 3. Click on the “Alignment” tab in the “Home” menu In the “Orientation” section, select the desired text direction from the drop-down menu.

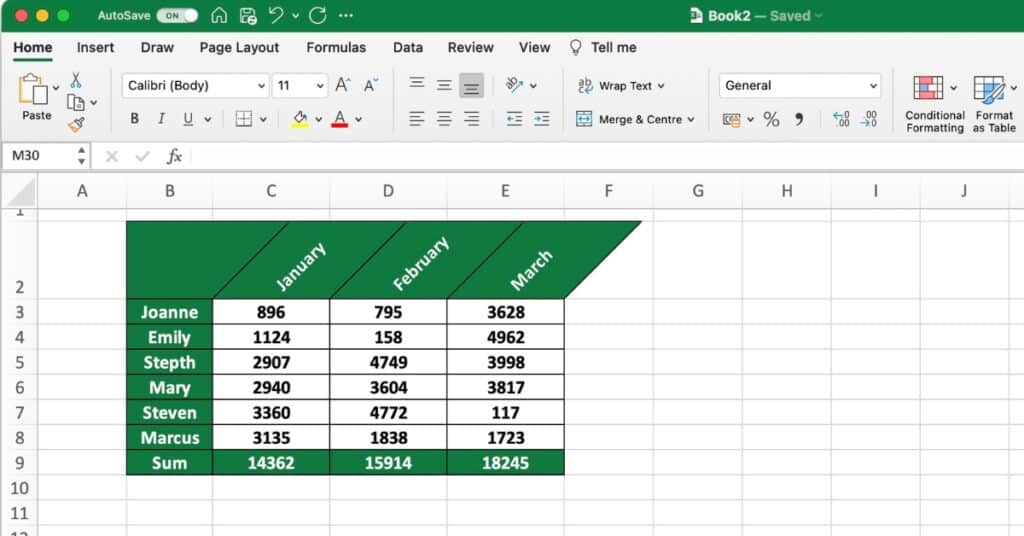
You can choose options such as Angle Counterclockwise, Angle Clockwise, Vertical, Rotate Text Down or Rotate Text Up.

Change Text Custom Direction Angle
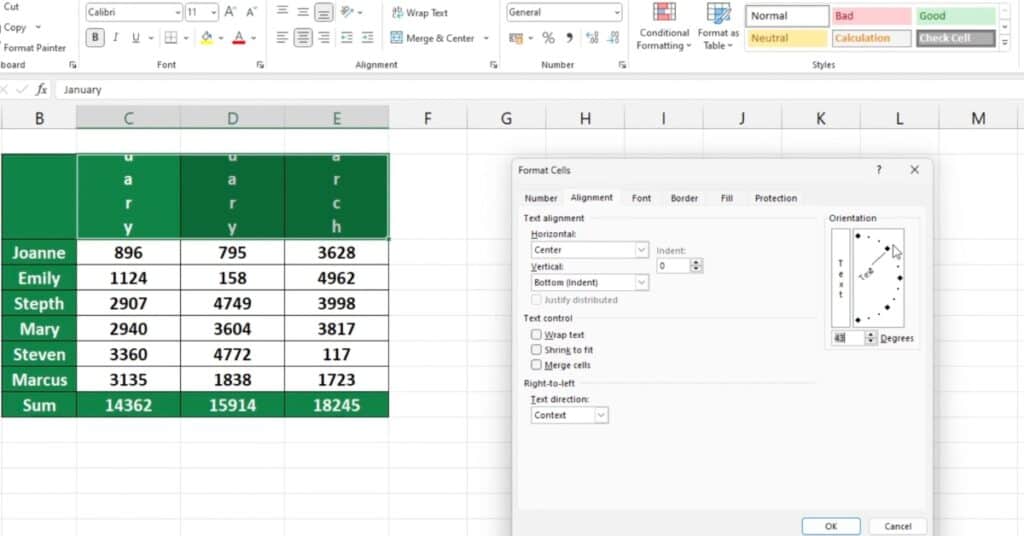
Step 1. Alternatively, you can set a specific degree for the text direction by clicking on the “Custom Angle” option and entering the angle in the provided box.
Step 2. With the “Custom Angle” option selected, type in the angle you want to use in the “Degrees” box. You can also use the up and down arrows to adjust the angle.

Step 3. Select the “Preview” box to see a preview of how your text will look with the chosen angle.
Step 4. Click “OK” to apply the changes to the selected cell(s).
That’s all there is to it!
With these steps, you should be able to easily use the “Custom Angle” or the “Orientation” feature to change the direction of your text as needed.
Things to keep in mind
- Changing text direction may affect the readability of your worksheet, so it’s important to use it sparingly and only when necessary
- Experiment with different text directions to see which one works best for your particular worksheet and data
- You can also use the “Wrap Text” feature in combination with text direction to improve the appearance of your worksheet.
If you are looking to learn Excel our site it the place to visit. Weather you are a beginner or an expert we will have something for you.
