In this tutorial, I’m going to show you how to lock cells in an Excel spreadsheet.
This way, you can protect them from being overwritten.
How to Lock Cells in Excel Video

Data We Are Working With
Let’s get started! As you can see, there is some data in this table representing sales made by John, Lucy, and Grace within a three-month time span of January, February, and March.
The bottom row contains formulas to create the sum of the sales for each month.

What we want to do is lock the cells with formulas, months, and names so they are read-only and can’t be edited, while leaving the cells containing sales data open for editing.
Here’s how to do it!
Lock All Excel Cells In Worksheet
The first step is to check the option to lock all the cells in the sheet.
You can do this by clicking in the top left-hand corner.
This will highlight the whole spreadsheet.
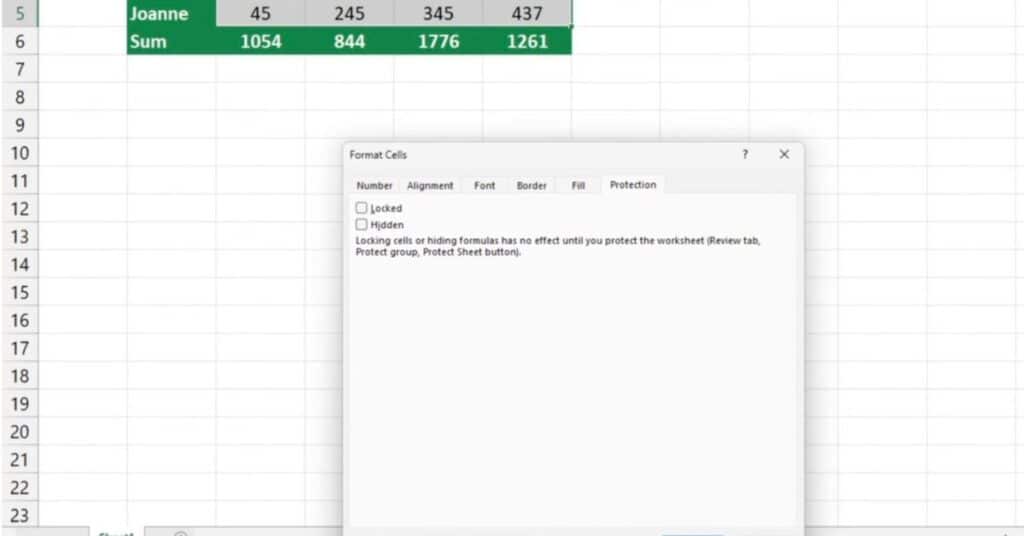
Then right-click, find the Format Cells option, and a pop-up window will appear.
Check to see if the Locked option has been selected on the Protection tab.

If it has, then all of the cells in the sheet will be locked.
Click OK and then we’ll move to the next step.
Select Unlocked Cells In Excel Worksheet
Now we’ll select the cells that we don’t want to lock.
These are the cells into which people will be able to type their data.
Right-click again and choose the Format Cells option.
For these cells, we will untick the Locked box.
This will leave them editable and people will be able to enter their own data here.
Confirm by clicking OK.
These two steps basically “tell” the software to lock all of the cells in the spreadsheet, and then which cells we want to keep unlocked and remain editable.
Protect Excel Sheet To Lock Cells
To make the magic work, the last step is to activate the “Protect Sheet” function.
This can be done through the Review tab with the Protect Sheet button.
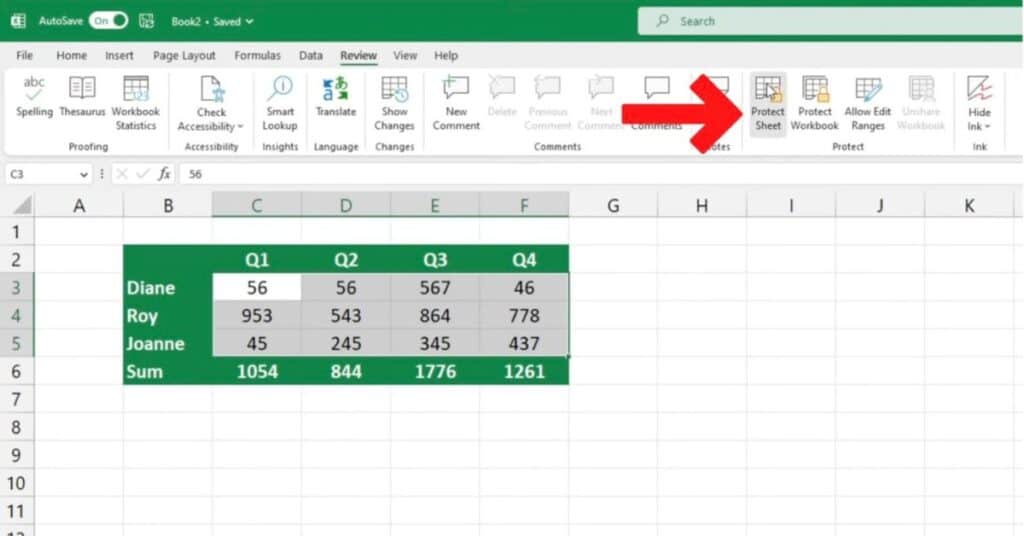
If you want to, you can also set up a password for security reasons.
I’m going to skip the password for now and just confirm it by clicking OK.
The spreadsheet with the cells as we selected them is now protected.
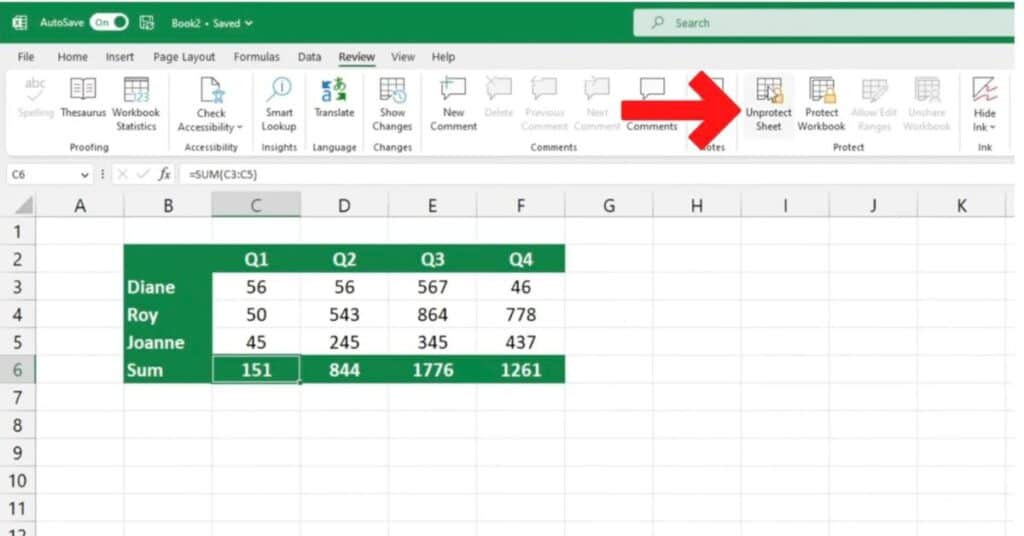
To double-check, the cells with the sales data can be edited, but the formulas, the rest of the table, all of the months, and the names have been locked and set up as read-only, so no one can override the information inside them.
Remove Excel Locked Cells
If you want to undo the protection, simply go to the Review tab and hit Unprotect Sheet, and all of the cells in the spreadsheet will be open for editing.
If you’ve found this helpful, we have many more like it on our website.
Don’t want to lock cells but still make data private then the perfect solution will be our How to Hide Sheets in Excel.
If you found this tutorial helpful, and if you want to learn Excel our complete guide section is the place to go that will help you use Excel like a boss!
Want to learn how functions work in excel then check out my excel functions page where you will learn many of the functions. Or looking for formulas? Well, we have you covered there too with our Excel Formulas page.