If you’re working with a sensitive Excel spreadsheet that you don’t want other people to edit, you can protect it with a password. This feature is especially useful when sharing a workbook with colleagues, as it ensures that nobody can accidentally (or intentionally) modify the data.
How to Protect Excel Sheet with Password Video

How to Protect Excel Sheet with Password
In this tutorial, we’ll walk you through the steps to protect an Excel sheet with a password.
Step 1: Highlight the whole sheet
First, click into the top left corner of the sheet and highlight the whole sheet.
You can do this by clicking on the box above the “1” and to the left of “A.”
Step 2: Format Cells
Next, use the right-click to find the ‘Format Cells‘ option.
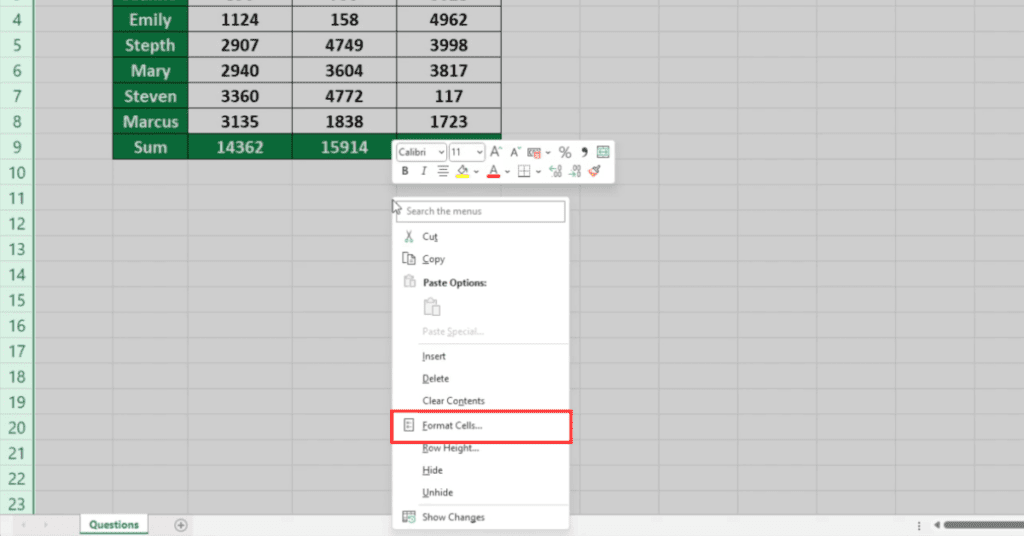
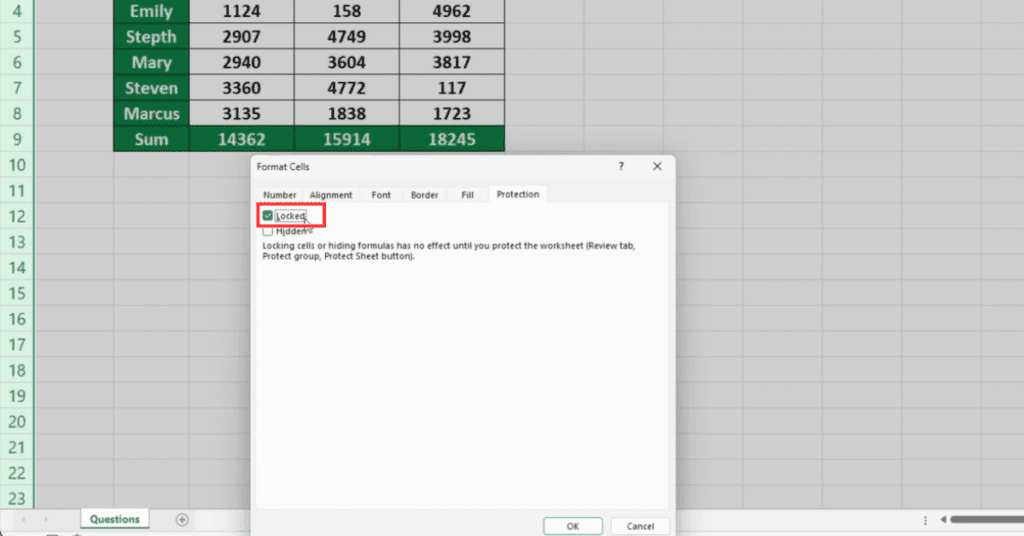
In the pop-up window that appears, go to ‘Protection‘, and make sure the box ‘Locked‘ is ticked.
This means that all the cells in the spreadsheet can be locked.
Step 3: Protect the Sheet
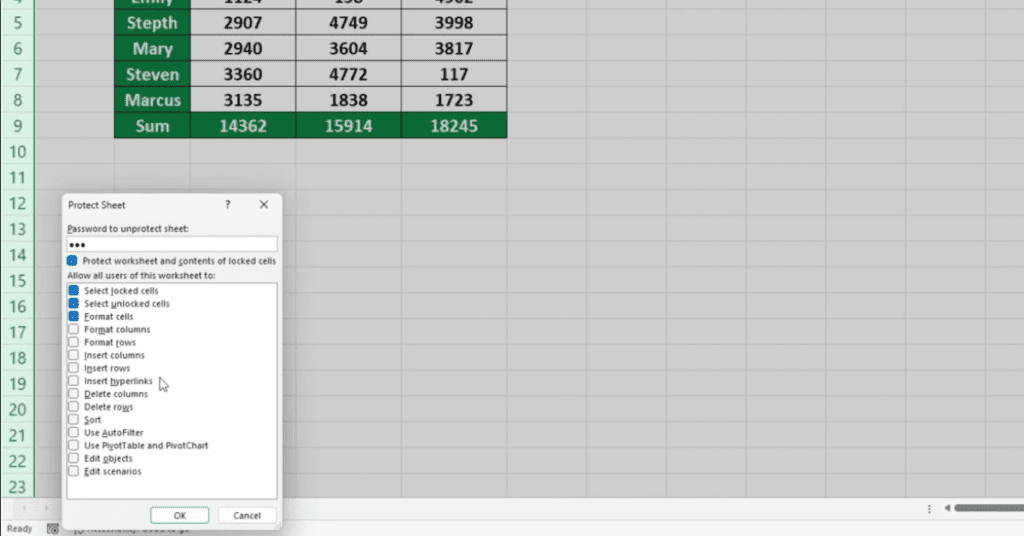
Next, right-click down at the bottom of the screen, where you can see the sheet name, and select the option ‘Protect Sheet‘. You’ll be given a pop-up window where you can type in a password to secure the sheet.

In this window, you can also choose which changes you’d like to allow other users to make.
Some of the options are already selected by default – for example, ‘Select locked cells‘, which allows other users to click into a locked cell within the spreadsheet.
Once you’ve set up everything, enter a password and click OK.
Excel will then ask you to retype the password as a reminder that it’s important to remember it, in case you forget it.
Step 4: Test It Out
To test that it works, try to click into a cell within the sheet. If you attempt to overwrite the data in the cell, Excel will not allow it and an alert message will show. However, if you’re only trying to format the cell, it should be allowed based on the settings you chose earlier.
Step 5: Unlock the Sheet
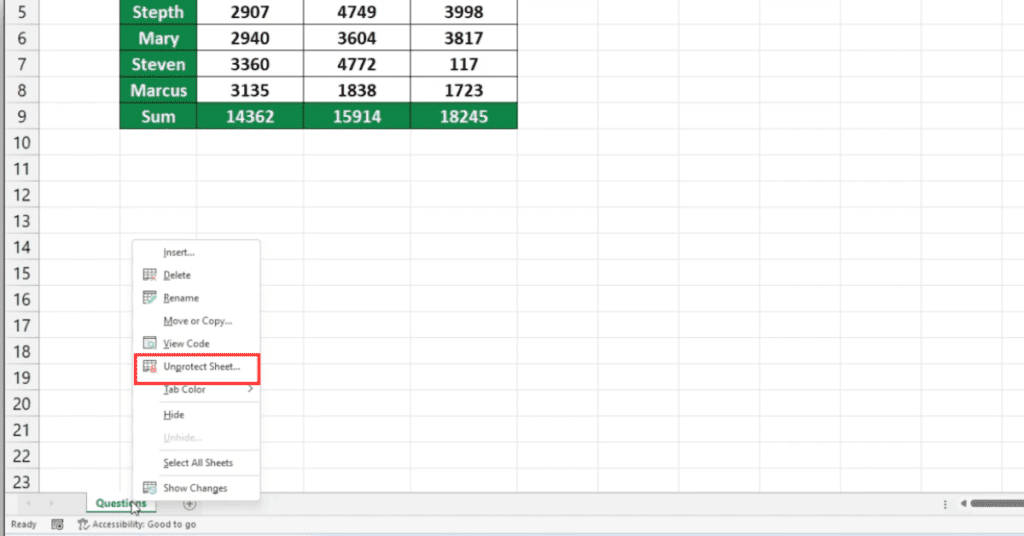
If you need to edit the protected sheet again, right-click on the sheet name. Select ‘Unprotect Sheet’, enter the password, and the spreadsheet becomes editable again.
And that’s it!
You’ve successfully protected an Excel sheet with a password.
Keep in mind that this password is case-sensitive, so make sure to remember the capitalization if you choose to use it. Additionally, you should keep a copy of the password in a secure location just in case you forget it.
We hope you found this Excel tutorial helpful. Happy Excel-ing!