I’m Lee and I’m going to show you quickly and easily How to Remove Duplicates in Excel.
This can save you a great deal of time, especially when comparing a large amount of data.
Let’s get started!
How to Remove Duplicates in Excel Video
Select the Search Area In Excel
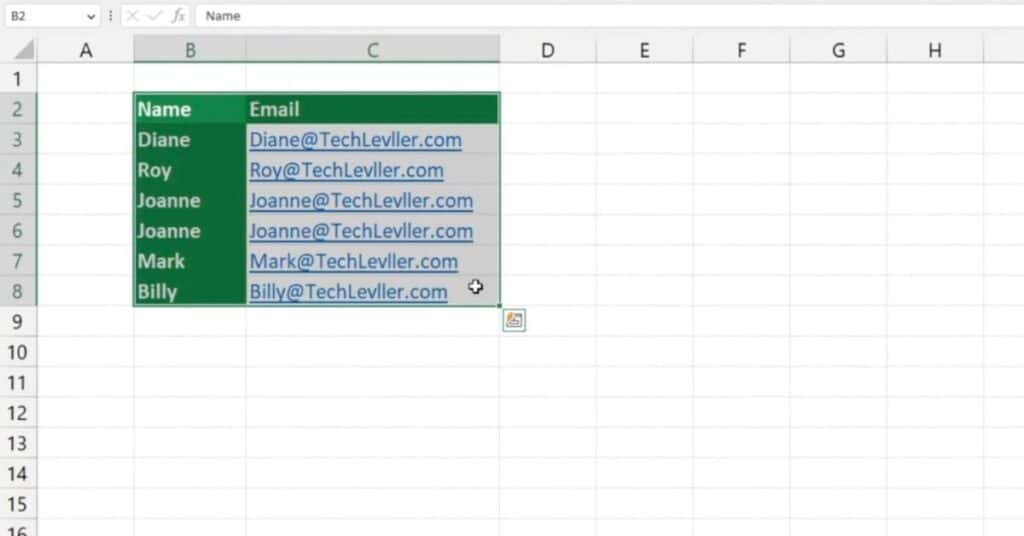
First, you’ll need to select the area in which you want Excel to find and remove duplicates.
In this case, we’ll select the whole table.

Remove Duplicates in Excel
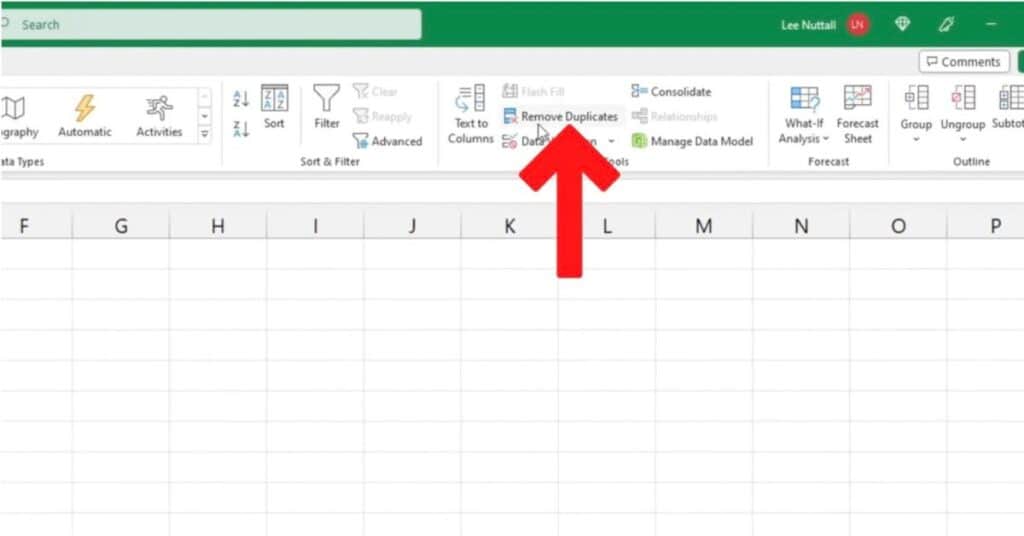
Click on the Data tab, go to Data Tools, and choose the option Remove Duplicates.

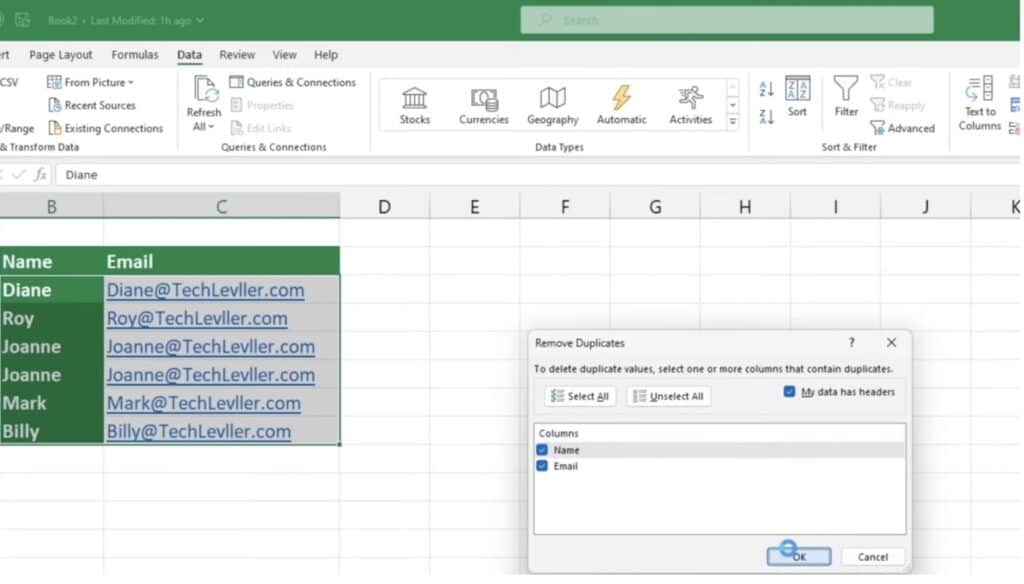
A window will appear, where you can choose the columns in which you want Excel to search for duplicates.
Usually, all columns are selected by default.
However, if you only want to work with the column ‘Email‘, you can deselect the box next to the column ‘Name’.
This way, Excel will look for duplicates only in the column with the email information and ignore the column with names.

Make sure to tick the box ‘My data has headers‘ if your table has headers.
Once you have everything set up, click OK and Excel will remove all the duplicates from the table.
It will also show you how many duplicates have been found and removed.
If you’re looking for a way to identify and highlight duplicate entries in a table, check out this How to Find Duplicates in Excel for a step-by-step guide.
If you found this tutorial helpful, and if you want to learn Excel our complete guide section is the place to go that will help you use Excel like a boss!
Want to learn how functions work in excel then check out my excel functions page where you will learn many of the functions. Or looking for formulas? Well, we have you covered there too with our Excel Formulas page.

Pingback: How to Find Duplicates in Excel | Beginner's Guide - Sheet Leveller